Once you’ve created your Spaces and configured your Slots, it’s time to organise your Spaces (if required) and finalise your setup, ensuring everything is clearly presented to your users.
Organise
The Manage Spaces page provides drag-and-drop functionality for Spaces; this means that you can:
-
Control the order in which the Spaces are presented to the user in the App
-
Organise Spaces into a hierarchy by using framework functionality
Instructions:
-
Use drag and drop to:
-
Specify the order in which Spaces are displayed in the App
The order in which your Spaces are displayed on the Manage Spaces page is the order that the Spaces will be displayed in App. You can use this to provide a better user experience for your booking organisers. As an example, you may wish to place the most important, or most frequently booked, Space first. -
Group Spaces within parent non-bookable Spaces
You can use non-bookable spaces to act as section headers or grouping labels. This allows you to create a visual hierarchy (e.g. “Meeting Rooms” as a non-bookable category, with individual rooms listed beneath). This approach can be applied whatever your grouping requirement, e.g. Zones, Floors, Categories, etc.
-
The video below provides a demonstration of the drag-and-drop functionality:
-
When you have arranged your Spaces as required, click Update System to save your configuration.
Finalise - Booking System
At this stage, the below review process might be a useful guide for users after they have configured their new booking system.
✅ Review Your Booking System
Review all elements of your new Booking System:
-
Status Check - Do you have all of the Statuses and Status Flows needed for your booking workflow? Have you created all of the Status Actions that you require?
-
Spaces – Have you included all the bookable Spaces your users will expect? Have you added images and documents that will provide your audience with the information they need when making a booking? Does the booking form for a Space capture all of the information that you require from the booking organiser when they submit a booking request?
-
Slot Schedules – Are your Slots accurate and do they reflect real-world availability?
-
Booking Rules – Double-check your Slot pricing and limits (if applicable).
When you’re ready, you can make your booking system available to your audience by creating a new button for your users.
Instructions
-
Navigate to the Manage your buttons page
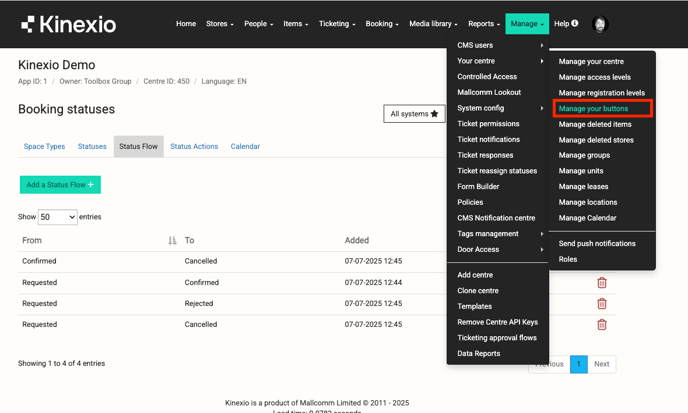
Navigate to the Manage your buttons page
-
Add a new button
Click “Add a new button” shown at the top of the Manage your buttons page
-
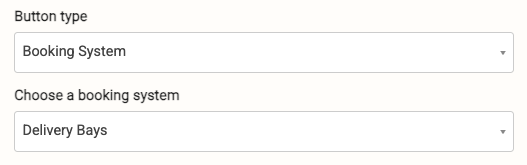
Configure your button
Configure your new Booking System button as required, ensuring that you specify a Button Type of “Booking System” and that you select the Booking System that you want to make available from the button (if you have multiple Booking Systems).
Please note: you might want to restrict the visibility of the button until you have had a chance to review the app from the user perspective (see below).
Finalise - App
When you have completed the above actions, it’s also recommended that you try the app yourself to ensure that everything appears as expected. The below review process might be a useful guide for App testing after having created, configured and reviewed the new booking system:
✅ Review Your Booking System - App experience
-
All bookable Spaces are displayed in the correct (desired) order.
-
Non-bookable Spaces are not displayed.
-
Each bookable Space:
-
Has the images and documents expected,
-
Allows booking of expected (pre-defined) Slots,
-
Displays the correct Pricing and has the correct Slot restrictions (if applicable).
-
When making a booking, all of the required information fields are displayed on the booking form
-
You might also wish to perform some test bookings to confirm that the Statuses, Status Flows and Status Actions all perform as you expect.